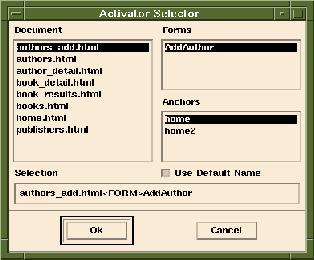
Object Bind Editor (New Activator) icon. The Activator Selector window will appear (Fig. 4-2).
Document list select home.html.
Anchors list select HREF=books. Click Ok.
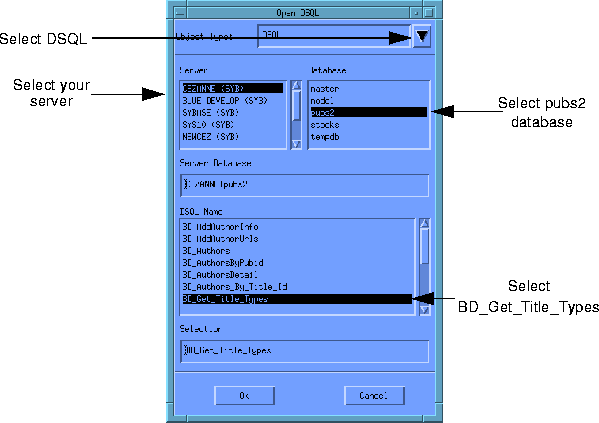
Object Type and select DSQL.
Server list.
pubs2 from the Database list.
BD_Get_Title_Types from the DSQL Name list.
Ok. The Object Bind Editor Window will appear.
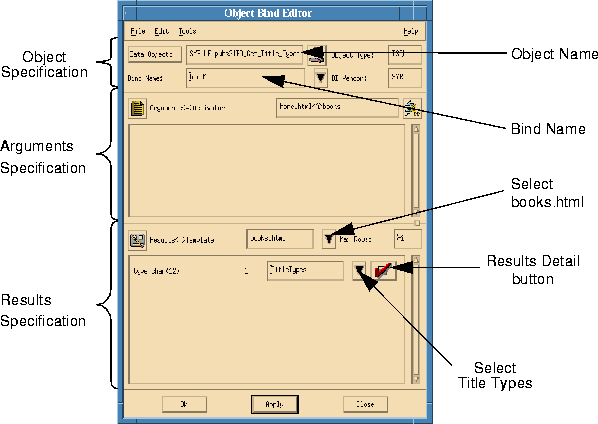
BD_Get_Title_Types) and that it is bound to the correct activator (the books anchor in home.html).
Results<=>Template, select books.html. The books.html document will be displayed and populated with the data from BD_Get_Title_Types when the books anchor is clicked.
type char(12) label click the down arrow and select TitleTypes. If you use the Document Manager to edit books.html, you will see the data site TitleTypes. The data from BD_Get_Title_Types called type will be used to populate the TitleTypes data site.
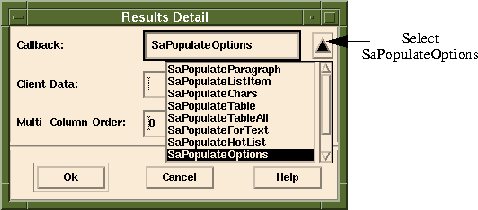
Callback and select SaPopulateOptions. You can click Help to find out more about this population callback.
Ok. The population callback function SaPopulateOptions will be used to format the data from the data object before it is used to populate the data site.
Apply. This will save your changes in memory and reset the change flags in the Object Bind Editor.
Ok to close the Object Bind Editor.
Edit->Options...
Category and select Project.
HTML Start-up Document from the Option list. Change the value to home.html.
Ok to close the Options Editor.
File->Save, then click the Test icon.
Messages window you will see Sapphire/Web reporting as it writes the HTML files to the disk and compiles and links the generated server applications (tut1.c and home.c).
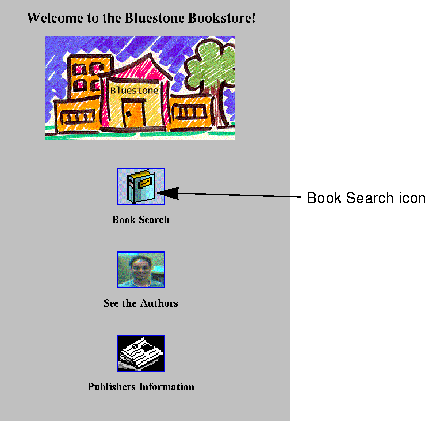
Book Search graphic to activate the first bind. The following occurs transparently:
As Sapphire/Web reads HTML documents, anything it finds that begins with ##Sa_ and ends with ## is considered to be a data site, and the text between the delimiters becomes the name of the site. You can put Data Sites almost anywhere in your HTML documents.
If the results returned from the database contain spaces, then you need to wrap the drop site in quotes as shown:
<INPUT NAME="author" VALUE="##Sa_Author##">
Category box. You will see a populated listing of topics.
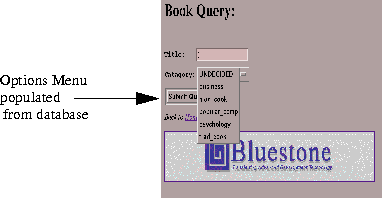
Book Search graphic, the options menu in books.html only contained a marker that acted as a placeholder for data objects:<OPTION>##Sa_TitleTypes##</OPTION>Now the placeholder has been replaced with real values that your DSQL object retrieved from your database.